 Getting started using the ASAP2Demo...
Table of contents:
- Introduction
- Graphical user interface description
- Find and select ASAP2 objects
- Change ASAP2 objects
- Add ECU calibration data
- Display, adjust and store calibration data
- Export and import calibration data
- Synchronizing A2L object addresses from an ELF file
- Connect to an ECU using XCP over Ethernet(TCP/UDP)
- Connect to an ECU using XCP on SxI (serial port)
- Activating and connecting to CAN hardware
- Connect to an ECU using XCP on CAN/CANFD or CCP
- Configuring DAQ lists for online measuring
- The ECUSimulator
- Starting the ECUSimulator manually
- Force ASAP2Demo to run as a 32Bit process
Introduction
After starting the ASAP2Demo...
- Open an example file from [File|Open] menu
- Open an existing ASAP2 (*.a2l) file from the [File|Open] menu
- Drag&Drop one or more ASAP2 (*.a2l) files onto the ASAP2Demo application
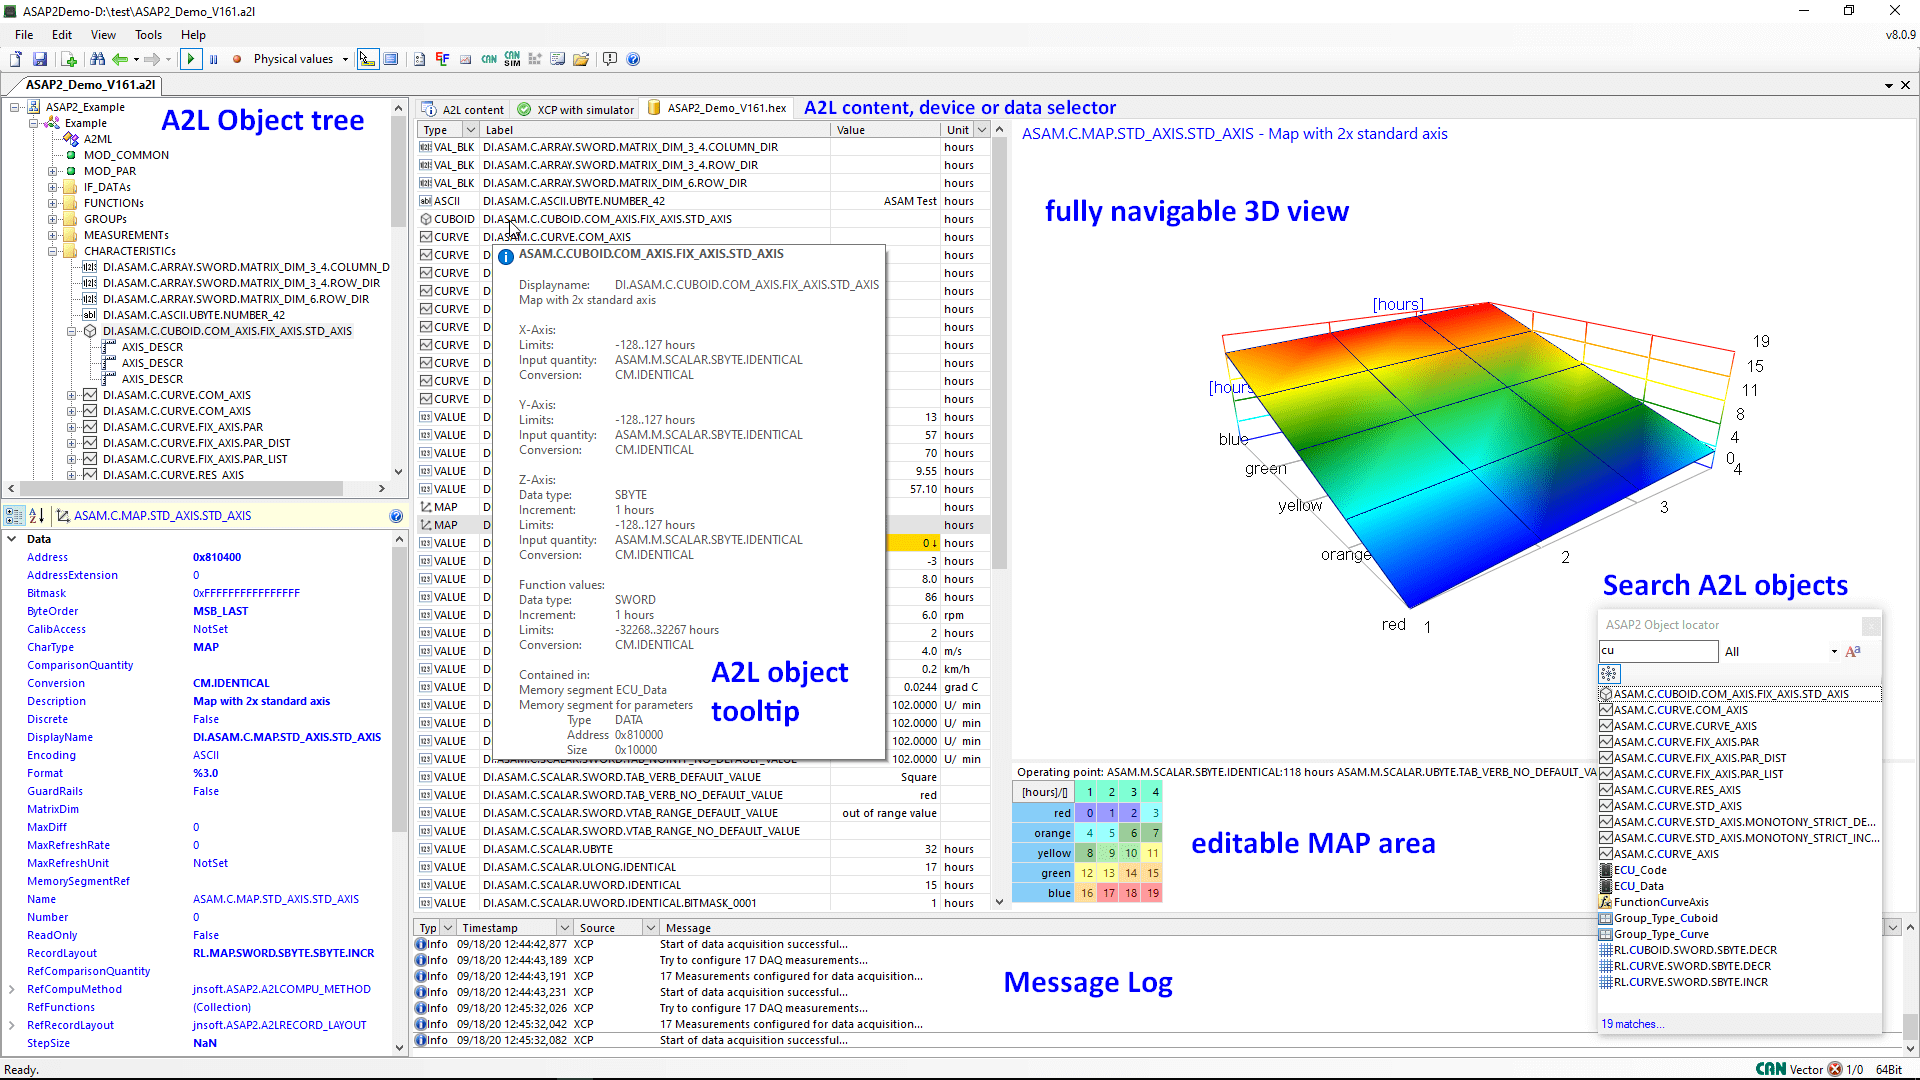
For each specified ASAP2 file a document is created displaying the ASAP2 hierarchy in a tree, the original content and the received ASAP2 parser messages in a data table. After selecting a specific ASAP2 object in the tree, the property grid below the tree displays properties corresponding to the selected ASAP2 object.
Graphical user interface:
How to find and select ASAP2 objects...
- Use the tree view to select your ASAP2 object.
- Open the search window using the CTRL+F shortcut to open the object search window. Selecting an object in the search window synchronizes the tree view and A2L content.
- Select a position in the A2L content manually.
Synchronize the tree and property view by a double-click or the context menu to the selected position.
How to change ASAP2 object properties
- You may change properties of selected ASAP2 objects in the ASAP2 object properties window.
- After changing ASAP2 object properties, ensure to save and reload the A2L file by using the 'File|Save' command to activate the changed properties.
- I recommend to never override the original A2L file!
How to add ECU calibration data files to the A2L model
- The ASAP2Demo application tries to load a suitable calibration (HEX/S19) data file anytime a A2L file is opened.
Falls eine gleichnamige Datei im selben Verzeichnis gefunden wird, wird diese automatisch geladen, ansonsten wird die erste im selben Verzeichnis gefundene Datei geladen.
To ensure loading the desired data file automatically, it is recommended to put the A2L and its data file into a standalone directory. - You can load a calibration data file by the [File|Load data file] menu command.
- You may save a changed calibration data file by using its context menu [Save file] command.
How to display, adjust and store calibration data
After a calibration data file is loaded...
- Select the tab 'Calibration data' to display or adjust calibration data
- By selecting a specific A2L function or group from the A2L object tree, the list of characteristics gets filtered
- Depending on the selected A2L characteristic
- A 2D-Control displays values for A2L single value type
- A ComboBox control display A2L single values depending on a dictionary (TAB_VERB and TAB_NOINTP computation types)
- A TextBox control displays A2L ASCII value types.
- A 3D-Control displays the values for A2L value block, curve and map characteristic types. Use the mouse and the 3D-control's context menu to adjust perspective, zoom and view.
- Numeric characteristic values are adjustable by context menu [Edit value...] or just start typing a new value on the keyboard.
- Numeric characteristic values are adjustable by the '+/-' keys using the default increment
- For characteristic values containing multiple values (value block, curve, map) a cell selection within the displayed data has to be done before adjusting using the '+/-' keys.
- The minimum increment/decrement value for a characteristic depends on the A2L defined data type and format.
After a calibration data file is changed...
- Use the context menu of the calibration page to store the adjustments as Intel Hex or Motorola-S file use:
How to export and import calibration data
After a calibration data file is loaded...
- Use the context menu of the calibration page to export or import calibration data as INCA DCM, CANape PAR, CDF or MATLAB-m file format.
Example:
Synchronizing A2L object addresses from an ELF file
- Open any A2L file with ASAP2Demo
- Open an ELF file containing symbols corresponding to the A2L objects
- The ELF File demo window displays a table with known A2L objects, the original A2L address,
the symbol's address read from the ELF file and a synchronizer message - If no A2L file is opened before the ELF File demo window displays only the ELF file analysis tabs.
ASAP2Demo only allows the updated A2L file to be saved using a licensed version, see ASAP2Demo licensing.
For an example of how to do an A2L address update using the ASAP2Library see the ELF example.
How to connect to an ECU using XCP on Ethernet (TCP/UDP)
After an XCP over Ethernet supporting A2L File is loaded...
- You are asked to connect to a 'real' ECU or simulate the ECU using the ECU simulator.
- ASAP2Demo lets you...
- Enable/disable the ECU connection
- Define a Seed&Key DLL to get access to the ECU
- Change the active calibration page (Flash or RAM)
- Read and Write calibration data from and to the ECU
- Copy the ECU's Flash page to the ECU's RAM page and vice versa
- Start/stop/configure data acquisition
How to connect to an ECU using XCP on SxI (serial port)
Preconditions:
- At least 1 available serial COM Port.
- Using the ECUSimulator on the same machine requires a second available serial COM Port for the ECU Simulator, connected by a Nullmodem to the first serial COM Port.
The com0com project exactly provides this without having to use any additional hardware.
Activating and connecting to CAN hardware
The philosophy of ASAP2Demo/ASAP2Library is to remain independent of vendor CAN hardware. The ASAP2Demo installer does not provide drivers for CAN hardware, but uses only CAN hardware drivers installed on the target system.
Depending on the CAN Hardware driver, ASAP2Demo searches the '%SYSTEMROOT%\system32' directory for a driver DLL. Manufacturer-specific information can be found in the following list of supported CAN hardware.
| CAN provider | 32 Bit driver | 64 Bit driver | Supports CAN FD |
Supports simulation |
|---|---|---|---|---|
| 8devices | usb2can.dll | usb2can.dll | ||
| Advantech | not needed | not needed | ||
| ESD | ntcan.dll | ntcan.dll | ✓ | |
| Eberspächer electronics | fcbase.dll | fcbase.dll | ||
| ETAS | ✓ | |||
| Actia I+ME XS series | location from OS registry | not available | ||
| Intrepid | icsneo40.dll | icsneo40.dll | ✓ | |
| IXXAT VCI3 IXXAT VCI4 |
vcinpl.dll vcinpl2.dll |
vcinpl.dll vcinpl2.dll |
✓ |
|
| Kvaser | canLib32.dll | canLib32.dll | ✓ | ✓ |
| MHS Elektronik Tiny-CAN | mhstcan.dll | mhstcan.dll | ||
| Lawicel | canusbdrv.dll | canusbdrv64.dll | ||
| National Instruments (NI-CAN) | nican.dll | not available | ||
| National Instruments (XNET) | nixnet.dll | nixnet.dll | ✓ | |
| Peak | pcanbasic.dll | pcanbasic.dll | ✓ | |
| Softing | canl2.dll | canl2.dll | ||
| Vector | vxlapi.dll | vxlapi64.dll | ✓ | ✓ |
How to connect to an ECU over XCP on CAN/CANFD or CCP
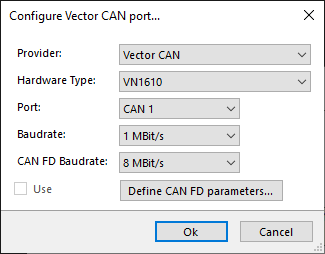
Prerequisites (for a Vector CAN enabled product), for any other type of CAN hardware, the same procedure of configuration applies:
- An installed Vector XL Driver library
Configuration:
- Click on the CAN button in the Statusbar to open the list of configured CAN ports.
- Create or edit a CAN port configuration by using the appropriate button.
- Select your hardware and the desired configuration.
- Exact CAN FD parameters can be defined via the 'Define CAN FD parameters' button.
- Using the ECUSimulator on the same machine, the hardware type must be set to 'Virtual'.
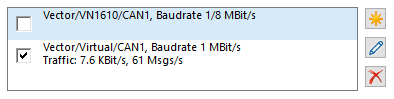
- After that, the configured CAN port is displayed in the list of configured ports:
Configuring DAQ lists for online measuring
The XCP and CCP DAQ selection pages displays available DAQ lists and connected DAQ events. The page allows to enable or disable each single DAQ List to be used in online measuring.
The ECU Simulator
- The ECUSimulator is implemented as a standalone console application (ECUSimulator.exe in the ASAP2Demo installation directory).
- The ECUSimulator may be started on any machine supporting the .NET Framework.
- Multiple instances of the ECUSimulator may be started on different IP ports on the same machine.
- Instances of the ECUSimulator on the local machine are connected, started and stopped automatically by ASAP2Demo.
- Never ever run more than one instance of ASAP2Demo with the same A2L in simulating mode! This leads to multiple XCP/CCP Master access on a single Slave. The behavior is not predictable in this case.
Starting the ECU Simulator manually
- Open a console window in the ASAP2Demo installation folder.
- The following command line is required to start the ECUSimulator process:
ECUSimulator [-debug] TCP:Port|UDP:Port|SxI:Port|CAN:CANHw:Port|CCP:CANHw:Port|UDS:CANHw:Port A2LFile|ODXFile [DataFile]
Examples:
XCP on TCP Simulator on port 1800:
ECUSimulator TCP:1800 ASAP2Example.a2l ASAP2Example.hex
XCP on SxI Simulator on serial port COM5
ECUSimulator SxI:COM5 ASAP2Example.a2l ASAP2Example.hex
XCP on CAN Simulator using Vector CAN on Channel 1:
ECUSimulator CAN:vector:1 ASAP2Example.a2l ASAP2Example.hex
CCP Simulator using Kvaser CAN on Channel 0:
ECUSimulator CCP:kvaser ASAP2Example.a2l ASAP2Example.hex
UDS Simulator using Kvaser CAN on Channal 2:
ECUSimulator UDS:kvaser:2 ODXExample.odx
The result is an ECUSimulator process supporting the specified protocol. The process simulates an ECU defined by ASAP2Example.a2l using calibration data from ASAP2Example.hex.
Force ASAP2Demo to run as a 32 Bit process
This paragraph is only of interest if ASAP2Demo is installed on a 64 Bit OS, but usually this is the default nowadays.
As the ASAP2Demo/ECUSimulator starts in this case in 64 Bit mode, using 32 Bit CAN drivers (the National Instruments CAN driver only supports 32 Bit applications) or using a 32 Bit Seed&Key DLL to get CCP/XCP/UDS access on ECUs will fail.
ASAP2Demo offers the following solution for this case:
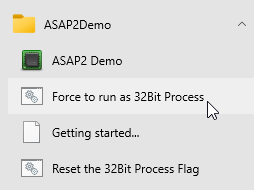
- The shortcut 'Force to run as 32Bit Process' in the ASAP2Demo folder forces ASAP2Demo/ECUSimulator to start as 32 Bit process.
- This only needs to be done once after ASAP2Demo has been installed or upgraded to a newer version.
- Executing the shortcut requires administrator privileges.
- Before executing the command, running ASAP2Demo/ECUSimulator processes must be stopped.